As Maryland roofing contractors, we’ve done our share of roof inspections. Today, we’d like to share some of the common installation mistakes we’ve seen. These mistakes may indicate lack of experience, lack of quality control or plain disregard for building codes and best practices on the part of roofing contractors. That’s why it’s important to do your research and hire a contractor who will treat your home as if it was their own and do a quality job on your roof!
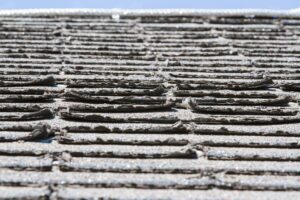
Bad Starter Strip
One of the mistakes we often see when inspecting roofs is improper installation of the starter strip. The starter strip is the layer of shingles underneath the first course along the edge of the roof. Some roofers simply take regular shingles, flip them upside down and nail them down as a starter course. The problem with this approach is that it doesn’t allow for proper adhesion between the starter course and the first layer of shingles. If you were to get on the roof and lift the first shingles you see, they would lift up with no problem, revealing the starter course underneath.
A better way to install a starter strip is to cut the tabs off a shingle and make sure the tar line is at the bottom edge closest to the edge of the roof. There are also pre-cut starter strips that can be purchased from roofing manufacturers. Installing a starter strip this way is important because otherwise your shingles can be lifted up by strong wind and potentially ripped off. And your wind warranty will be void due to improper installation.
Here is a video from GAF, one of the shingle manufacturers we frequently use, showing how the starter strip works:
No Drip Edge Flashing
The drip edge flashing in the roofing industry refers to a piece of metal that covers any gaps between the roof deck and fascia/gutter board. The drip edge flashing’s main purpose is to prevent rain, snow and ice from getting inside the roof and rotting the rafters and causing other sorts of damage. For example, if ice is to dam up in your gutters, it could potentially push its way under the roof. Drip edge flashing is designed to prevent this. Similar flashing, although not required, can also be installed along the rake edge—the gable side of the roof where the water doesn’t typically roll off. In this location, flashing can protect from sideways rain.
As a bonus, edge flashing also protects your home from opportunistic animals that may lift the shingles up and discover a way into your attic. Another benefit of a drip edge is to support the shingles and prevent them from curling inward, which may also lead to leaks.
Watch this video to better picture where drip edge flashing should be and what it does.
Poor Vent Flashing
As you can imagine, flashing also needs to be installed around any plumbing or air vents that penetrate your roof. Most roofers know this and will put the flashing up, but not always correctly. A protective boot should be placed around the vent pipe, forming sort of an umbrella. This boot prevents water from leaking straight down the pipe and into the roof. If nails are used to attach the flashing, they should be sealed, because if not sealed they may eventually develop a leak. The vent pipes should be painted with latex paint to protect them from UV damage.
Here is some more information about what bad vent flashing looks like:
No Chimney Cricket
A cricket (or a saddle) in the roofing context is a piece of metal installed behind a chimney to form a hump. Crickets are recommended for chimneys 30” wide or wider. The purpose of the cricket is to prevent water from pooling behind the chimney as it rolls down the slope of the roof. Thanks to its hump-like shape, the cricket breaks the water up and sends it around the chimney, which helps prevent leaks. Not only should a cricket be present on roofs where it’s required, but it should also be installed properly with the right amount of flashing.
Below is an example of a cricket that was not properly attached to the chimney.
Exposed Nails
If your roof installer was rushing the job, it’s possible that his team misplaced a few nails or staples. All nails have to be covered by the shingle tabs during a roof installation. Any exposed nails will eventually rust and may result in leaks. Another thing with nails is how straight they were driven in and how deep. Nails that were inserted at an angle or that push too deep may cause damage to the shingles and actually make it easier for a shingle to be lifted during a wind storm.
All of these problems can be revealed during a roof inspection. If you are buying or selling a home, or think your previous roofer may have done a shady job, give us a call for roof inspection in Maryland! We’ll take pictures of any problems we find and offer you options for roof repair!